Aluminium Profile for LED Strips: A Heat Sink First, a Housing Second
Most descriptions of LED aluminium profiles list the housing functions: protection, appearance, diffuser mounting. Those are real but secondary. The section’s first job is to move heat out of the LED junction, because junction temperature is what decides how long the strip lasts.
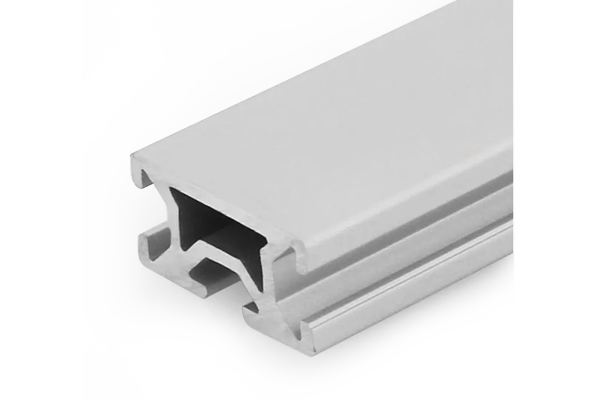
Short answer
An aluminium profile for LED strips is a heat sink that happens to also hold a diffuser. LED lumen depreciation is driven by junction temperature, and the practical rule of thumb in the industry is that life roughly halves for every 10 °C rise. Heat leaves by conduction through the strip’s backing into the section, then by convection and radiation off its surface. That is why section mass, surface area and finish all matter: a heavier section with more fin area runs cooler, and an anodised surface radiates far better than bright bare aluminium.
The housing functions are the easy part
An LED profile does four visible jobs: it carries the strip, holds a diffuser, hides the tape and its wiring, and gives the fitting a finished edge. Every supplier describes these, and they are the reason an aluminium section is used instead of sticking tape straight onto a surface.
None of them is the hard part. The hard part is that an LED strips converts a substantial fraction of its input power into heat rather than light, and that heat has to leave through the very small area where the tape is bonded. If it does not, the junction runs hot, and a hot junction is a short-lived one.
So the section is doing two things at once, and they pull in opposite directions. A slim, neat profile is what a designer wants to see. A high-mass, high-surface-area section is what the thermal problem wants. Every LED profile on the market is a compromise between those two, and understanding the compromise is what separates a specification from a purchase.
What actually fails
LEDs rarely fail outright. They dim. Lumen depreciation is gradual and it is driven by temperature, and by the time it is visible the fitting has already lost a large part of its output. Heat management is not about preventing failure; it is about preserving output.
Where the heat goes, and where it gets stuck
The thermal path from an LED chip to the room air has several steps, and the bottleneck is rarely the one people expect.
Heat starts in the semiconductor junction, passes through the package into the strip’s printed circuit backing, crosses an adhesive interface into the aluminium section, and then leaves the section by convection to the air and by radiation to the surrounding surfaces. The aluminium is the best conductor in that chain by a wide margin; the interfaces are the worst.
That is why the adhesive bond between strip and profile matters more than the section’s alloy. A tape with poor thermal contact, or a strip laid on a surface with a gap under it, adds a thermal resistance that no amount of extra aluminium can recover. The section can only remove heat that reaches it.
| Step | Path | Typical behaviour | Practical note |
|---|---|---|---|
| Junction to package | Within the LED | Fixed by the LED maker | Outside the profile’s control |
| Package to strip backing | Through the PCB | Good if the backing is metal core | Specify metal-core strip for high power |
| Strip to profile | Through adhesive | Usually the bottleneck | Full contact, no bubbles, no gaps |
| Through the section | Conduction | Fast; aluminium is a good conductor | Spreading matters more than thickness |
| Section to air | Convection + radiation | Set by area, orientation and finish | The part the section design controls |
Why anodising is a thermal decision, not a cosmetic one
Anodising is usually sold on LED profiles as corrosion protection and appearance. It has a third effect that is more important than either, and it is the one that makes anodised LED profiles measurably cooler than bright ones.
Heat leaves a surface two ways: convection into moving air, and radiation as infrared. Radiation does not need air movement, which is exactly the situation in a recessed or enclosed fitting. How well a surface radiates is set by its emissivity, a value between zero and one.
Bright, polished aluminium has a very low emissivity — it is a poor radiator and a good mirror, which is the same property seen from two directions. An anodic oxide layer raises emissivity dramatically. The practical consequence is that a dark or anodised section can shed a meaningful share of its heat by radiation that a bright section essentially cannot, and in still air that difference is real rather than theoretical.
- Lowest emissivity, radiates poorly
- Relies almost entirely on convection
- Performance drops sharply in still air
- Cheapest and most common
- Suits low power densities only
- High emissivity, radiates well
- Convection plus a real radiation share
- Holds up better in enclosed fittings
- Adds a process step and cost
- Preferred at higher power per metre
Note that colour matters less than the oxide itself. The layer, not the dye, is what changes the radiative behaviour. A clear anodised section gains most of the benefit that a black one does.
Power per metre sets the section, not the other way round
The single number that should drive an LED profile choice is the power the strip will draw per metre of length. Everything else follows from it.
A low-density strip used for accent lighting puts a modest heat load into a small section and runs cool enough in a slim profile. A high-output strip used for task lighting puts several times that load in, and in a slim section it will run hot regardless of how good the aluminium is, because there is not enough surface to shed the heat and not enough mass to spread it.
The two levers available are section mass, which spreads heat along the length and buys thermal capacitance, and external surface area, which is what actually sheds it. A profile with fins or a wider outer surface beats a solid block of the same weight, because shedding is a surface phenomenon and spreading is a conduction one.
STEP 1
Establish watts per metre. From the strip’s specification, at the drive current you will actually use.
STEP 2
Decide the mounting. Surface mounted convects freely; recessed does not.
STEP 3
Choose section mass and area. More of both for higher power or enclosed mounting.
STEP 4
Specify the finish. Anodised where radiation matters, which is most enclosed cases.
One trap worth naming: strip power is often quoted at a nominal current that the driver will not actually deliver, or at a maximum the strip can survive rather than the level it will be run at. Ask for the figure at the intended drive current, because that is the heat the section has to move.
What to send with an LED profile enquiry
LED profile enquiries are usually sent as a length and a profile name. That is enough to quote a price and not enough to know whether the fitting will run cool. Six items fix it.
RFQ checklist – LED profiles
- Strip power per metre — at the drive current you will actually use, not the maximum rating.
- Strip width and backing type — metal-core backing conducts far better than a flexible plastic one.
- Mounting method — surface, recessed, suspended or corner; this sets the convection available.
- Duty cycle — continuous or intermittent; it changes the thermal design point.
- Ambient temperature — especially for enclosed fittings or ceiling voids.
- Finish — anodised for radiation, and state whether colour matters or clear is acceptable.
- Diffuser type — it traps heat; an opal diffuser over a high-power strip raises the temperature.
- Length and cut tolerance — and whether end caps and fixings are in scope.
If you can, state the target junction or case temperature. It turns the section choice from a guess into a check.
Four ways an LED profile runs hot
Related on this site
- PG20 20 x 20 four-slot profile— a compact section for light-duty channels
- PG40 40 x 40 single-slot profile— one open face for a strip, three solid faces for mounting
- Strut profiles category— the structural section range
- Anodised vs powder coated profiles— the coating decision in more depth
Terms used in this article
- Junction temperature
- The temperature at the LED semiconductor itself; the primary driver of LED life and light output.
- Lumen depreciation
- Gradual loss of light output over time, accelerated by heat.
- Emissivity
- A measure of how effectively a surface radiates heat, from 0 to 1; higher radiates better.
- Metal-core PCB
- A strip backing with a metal layer that conducts heat away much better than a plastic one.
- Thermal interface
- The bond between two surfaces in a heat path; often the largest resistance in the chain.
- Duty cycle
- How much of the time the fitting is actually on; sets the thermal design point.
Questions buyers ask
Does the profile finish really change the temperature?
Yes, through radiation. Bright aluminium radiates poorly; an anodic layer raises emissivity substantially. The effect is largest where air movement is limited, which is most recessed and enclosed fittings.
How much power per metre can a slim profile handle?
It depends on mounting and ambient more than on the section alone. As a working approach, low-density accent strips suit slim sections; high-output task lighting needs more mass and surface area. State the power and mounting and have it checked.
Is black anodising better than clear for cooling?
Only marginally, and often not measurably. The oxide layer is what raises emissivity; the dye colour has a much smaller effect. Clear anodising captures most of the benefit.
Why does my strip still run hot in a big profile?
Usually the interface or the enclosure, not the section. Check for full adhesive contact along the length, and check whether a diffuser or recess is trapping heated air around it.
Should I specify a metal-core strip?
For anything above low-density accent lighting, yes. The backing is the step between the LED package and the section, and a plastic backing is a thermal bottleneck the section cannot compensate for.
Send the watts per metre and the mounting
Give us the strip power at your drive current and how the fitting is mounted, and we will size the section and the finish for the heat it has to move.
Request a quoteRelated reading
Twelve more engineering notes from this blog, picked for this article — plus every category below.
 Materials and EngineeringIndustrial Aluminum Profiles: Alloys, Tempers and How to Select Them
 Engineering DesignAluminium vs Steel, Extruded vs Cast: What Actually Changes
 Engineering DesignAluminum Corner Brackets for T-Slot Frames: How to Choose by Load Path, Not by Looks
 Engineering Design3030 vs 4040 Aluminium Profile: Which for Your Frame
 ApplicationsAluminium Workstations: From Fixed Benches to Reconfigurable Cells
 ApplicationsBuilding with T-Slot: Frames, Fences, Workbenches and Guards
 Materials and EngineeringIndustrial Aluminium Extrusion: Five Advantages and the Conditions Attached to Each
 ApplicationsCleanroom and Medical Framing: There Is No Medical-Grade Aluminium Extrusion
 Engineering DesignESD Anti-Static Workbench Grounding: The Four Joints That Break the Path
 Engineering DesignHow to Request a Quote for Custom Aluminium Extrusion (RFQ Checklist)
 Quality and InspectionAluminium Extrusion Claims: What the Contract Must Say
 Engineering DesignSlot Dimensions Explained: 6 mm, 8 mm and 10 mm T-Slots